
Digital Art Backgrounds - Using Boris Optics With Daz Studio For Your Visual FX Backgrounds.
Adding interesting and creative digital art backgrounds to your artworks can be transformative, taking images beyond ordinary and making them extraordinary. In this blog post, I show how Boris Optics software can make your digital artworks into modern and contemporary wall art.
Philip Preston
2/15/20266 min read
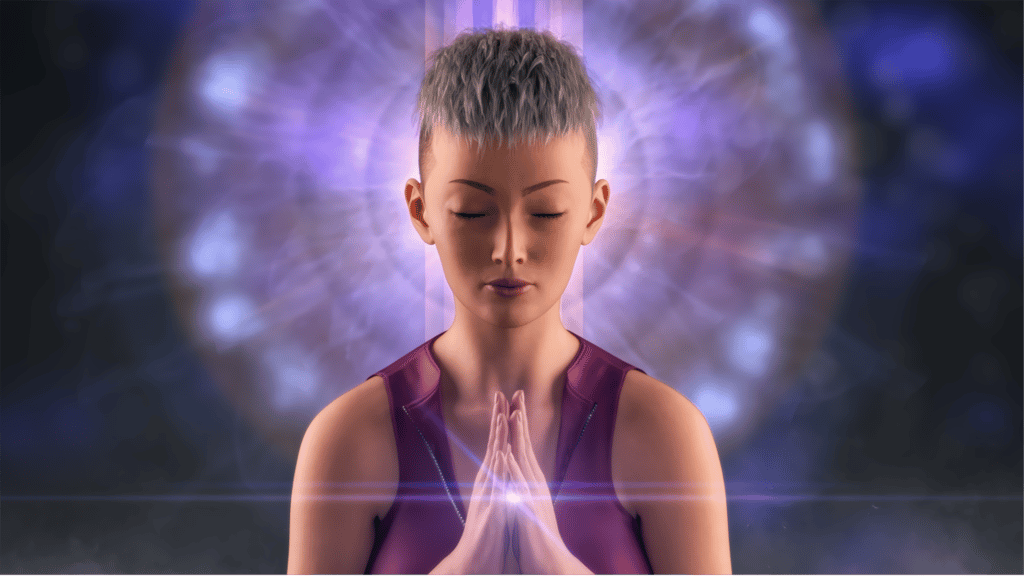
In 2025, I started using Daz Studio, a free-to-use 3D modeling, rendering, and animation software application developed by Daz 3D, designed to create, pose, and render digital human characters, creatures, and scenes. Although backgrounds can be created or added directly within Daz Studio, for example, using your own photographs, my rendered outputs from the application often have transparent backgrounds and are subsequently exported as png files. This gives the flexibility to create and add my own backgrounds during the post processing stage of an image, and one of my favourite ways of doing this is with Boris FX Optics software. Boris FX is a leading developer of award-winning visual effects (VFX), compositing, titling, video editing, and photography plugins, widely used in the film, television, and post-production industries, and its Optics software is designed for photographers and digital artists to create professional, film-quality effects for their photographs and artworks. In the examples below, I show some backgrounds created with Boris Optics for my own digital artworks. The original file from Daz Studio is shown on the left, while the final version edited with Optics is shown on the right.

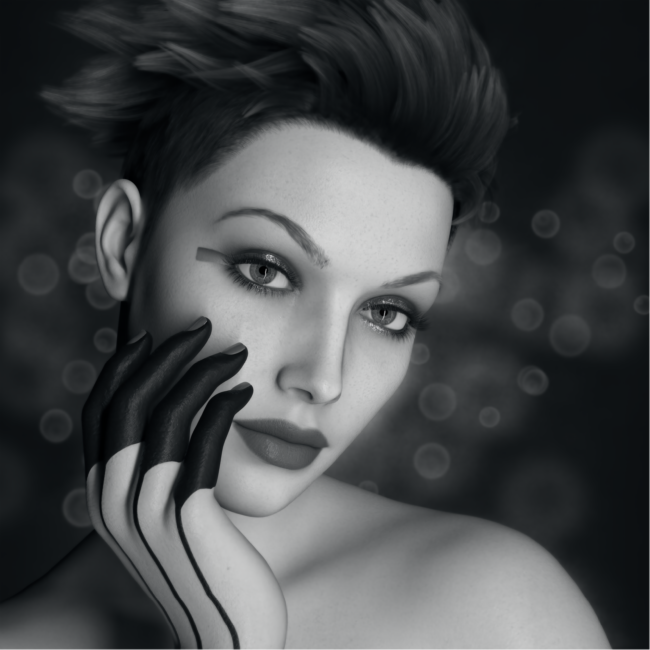
The female portrait character below was created with Daz Studio and rendered with a transparent background, so I wanted to add some interest in the background to make the final image more visually appealing. My preference for this image was to create a black and white version of the portrait, so after opening the file in Boris Optics, I first added a dark grey background, and then converted the portrait from colour to black and white. To finish, I added some simple but subtle bokeh effects to the background which changed the image from a basic style portrait into something more visually sophisticated.

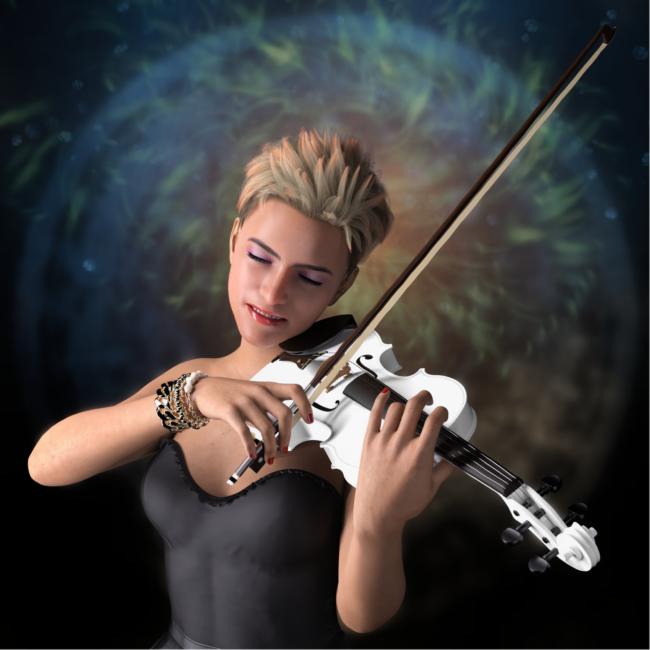
Wile the previous examples required the addition of subtle effects to achieve the final result, this image of a young woman playing a white violin required a more prominent background as this accounted for approximately half of the total image space. To start, I added a dark grey background, then added a number of layers to build up a colourful textured background in the upper half of the image, using masking to hide the added effects from the lower part of the image. When backgrounds are made up of multiple layers and effects, the working file can be saved and continued or edited at a later date and time if required. This could also be useful if you wish to apply a similar background to a number of different images.
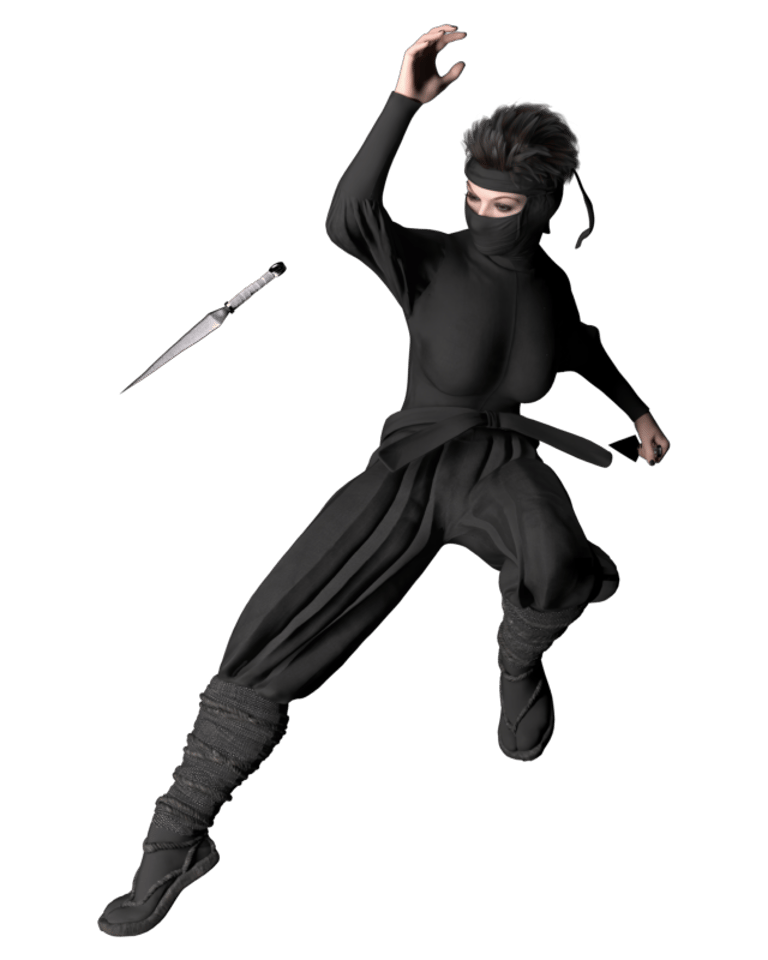
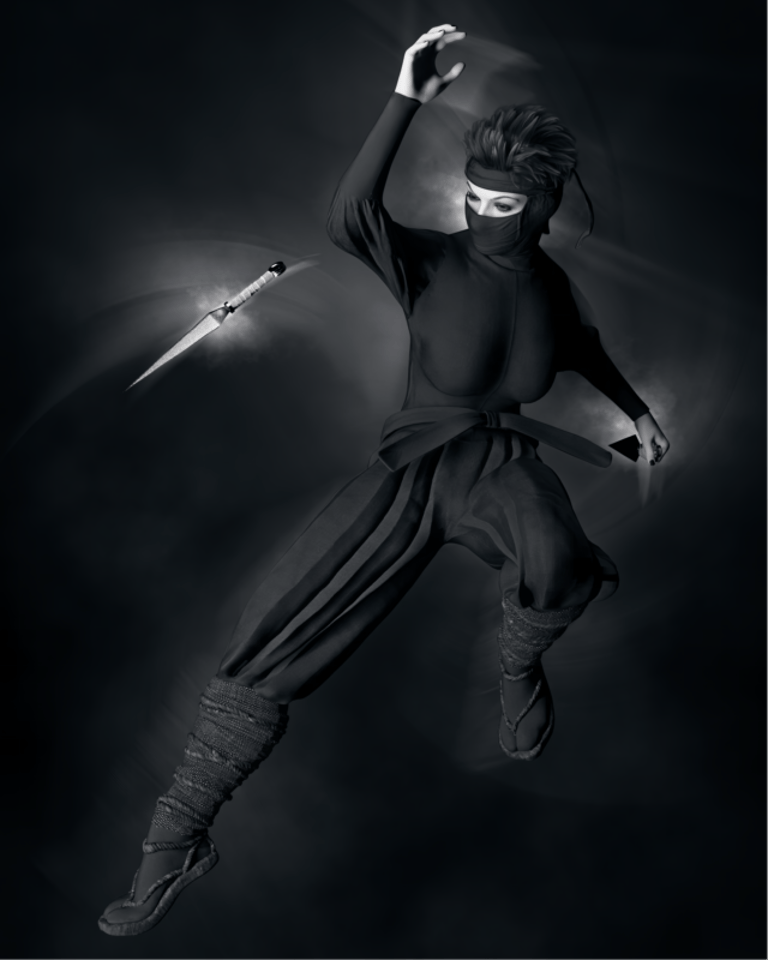
This image of a Ninja warrior in a fighting pose and wearing dark clothing was intended to be shown with an equally dark background, which raises the question of how to add lighting effects that give some separation of the subject from its background. The most important sections for this were the face, hands and weapons, and without attention to this would result in an image looking flat overall.
After adding the dark grey background, I used a number of Optics layers to add light and motion effects to the image that I think have made it visually and successfully more interesting. The final version of the image is monochromatic in appearance, but would have been equally interesting if some subtle use of muted colours had been used for the hands, face and weapons. These are of course all personal preferences, and I do enjoy the creativity of making decisions on these things as the image's development progresses.
Incidentally, when creating this type of monochromatic image with a dark subject and dark background, I usually make the added background slightly lighter than pure black (often using HEX code #111111) to give a small amount of separation between subject and background.
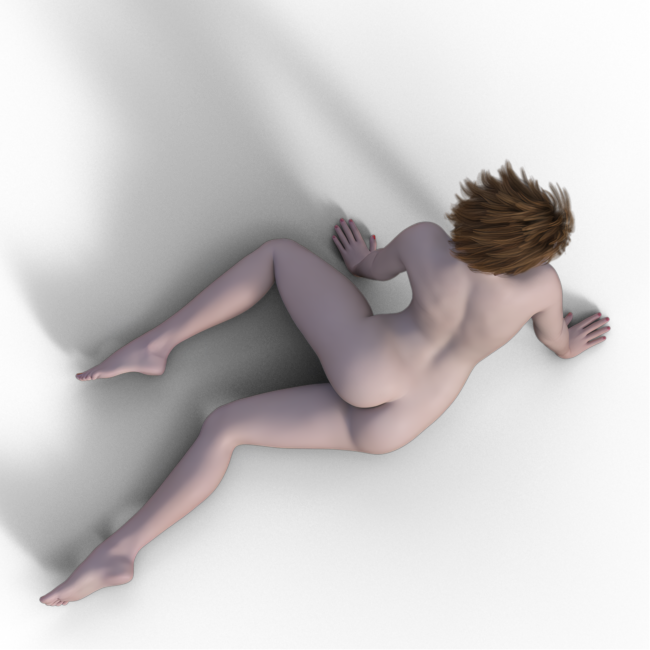
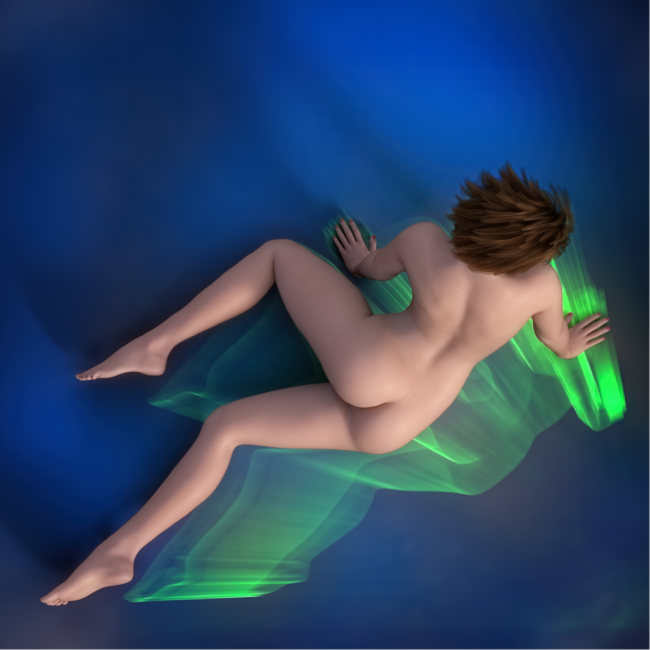
On some occasions, an image may need a more prominent background if the original is a little bland. For the example below, I wanted to add a coloured background that contrasted nicely with the female torso, but also some secondary interest to further add to the finished image. To start, I added a blue background, the cool tones contrasting well with the warm coloured female skin tones. The floor shadows had already been rendered in Daz Studio, so these added further visual interest to the scene. For the secondary element, I added some bright green light rays that contrasted nicely with the blue colour, but also gave visual interest to the lower right hand corner of the image giving the final image a more balanced look. Although the blue colour background could easily have been added in Daz Studio, doing this during the post processing stage after the initial image render gives more flexibility regards final decisions on the finished image. Changing decisions on things like background colour is much quicker during the post processing stage, compared to going back into Daz Studio and re rendering the entire image again.
For anyone considering the use of 3D software such as Daz Studio to produce fine art photography style images, I have produced a separate blog post on this which can be seen here.

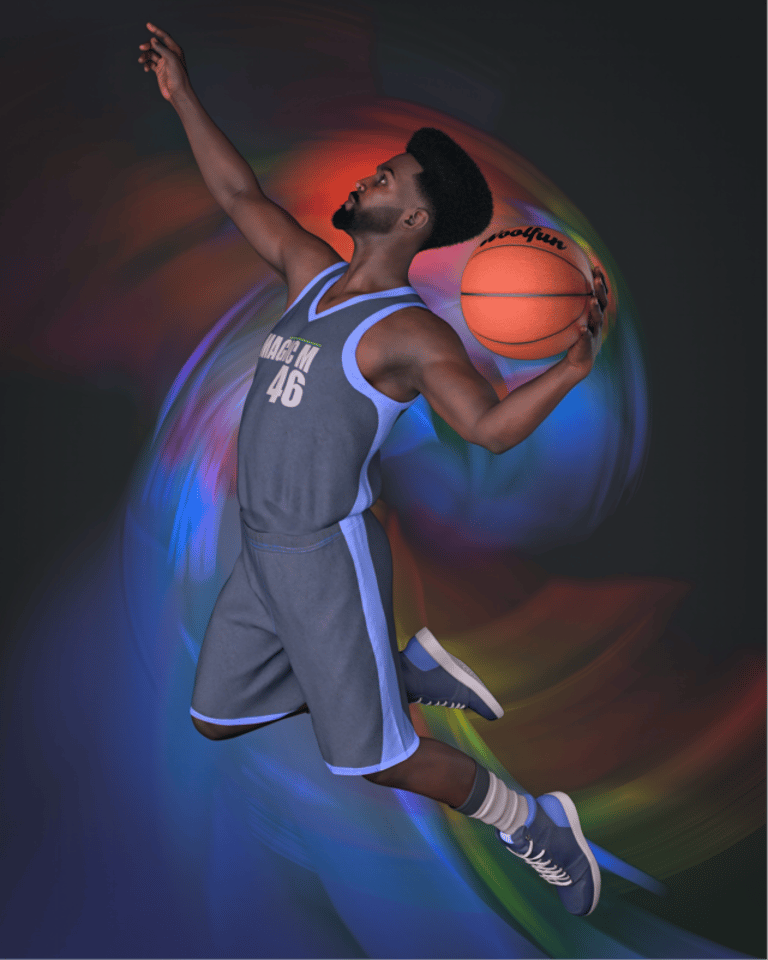
For this image of a male basketball player, I again wanted to add some additional colour into the image, but also inject some dynamic motion as well. I started by adding a dark grey background, then used the Boris Optics Prism filters to enhance the sense of movement in the original image. These filters are particularly good in my opinion for adding this type of effect, and each individual filter effect can be edited if desired, for example, for better positioning of effects. Its also possible to use multiple versions of filters in their own separate layers to build up the type of effect required. Trying different blending modes on these layers can also produce interesting effects, for example, building up a more complex sense of motion, or having the effects produced as a mix of colour and monochrome in the final image. As always, its worth trying different things to experiment and seeing what can be produced.
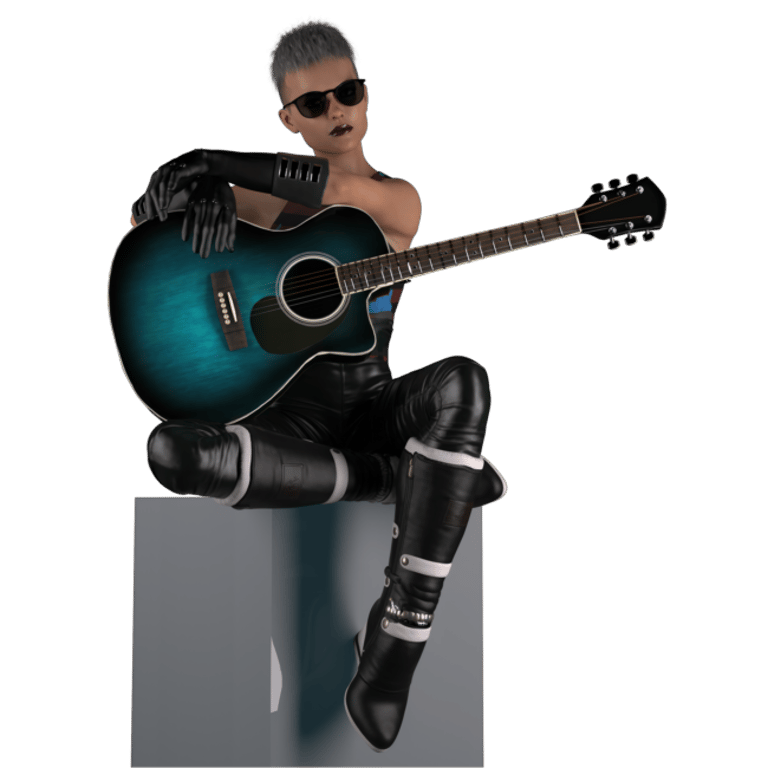

This final example takes an image of a female character sitting on a cube and holding a guitar, then adding a variety of different visual effects to the background including smoke and mist, glinting light patterns, and dollar notes falling from above. All these effects are built up individually using layers within Boris Optics. The added effects in this image play a more prominent part compared to the more subtle effects in previous examples. All the effects can be controlled and adjusted in a variety of different ways, including layer opacity and blending modes, but also by adjusting the items parameters individually for things like colour, brightness, size, rotation, and a multitude of other different adjustments.
Conclusion
If you have digital artwork files with transparent backgrounds that would benefit from the addition of visual effects, then Boris Optics is a software application that can help. It can work either as a standalone application, or as a plugin to other image editing software such as Photoshop or Lightroom. Its uses can range from simple and basic background additions, like minor bokeh effects in studio style portraits, through to full on prominent effects that add a significant impact to the final image.
Boris Optics has a good range of selection and masking tools available so added effects can be controlled regards their appearance in an image. All filter effects have a large number of editable parameters than can be tweaked where required to your preferences, so default settings can be considered just a starting point, although many default settings work fine as they are and may require no further adjustments.
It should be noted that Boris Optics will not work for situations where things like specific types of backgrounds are required, such as landscapes featuring desert or woodland forests, or cityscapes requiring a skyline of buildings, separate methodologies will be required for these. Examples might include one of your own photographs, or an image from a stock photo site, or a 3D program such as Daz Studio capable of rendering appropriate objects. But Boris Optics can still be useful for these situations where visual effects are required to enhance landscapes or buildings further, perhaps adding some smoke or mist to a landscape image, or bolts of lightning to buildings in a cityscape.
Overall, I find Boris Optics an important part of my post processing work flow for images rendered with Daz Studio, and would suggest looking into it further if you also like to add visual effects to your own digital artworks.
For anyone interested, further details on Boris FX software, including Optics, can be found on their own website.
All of the above examples are available as prints on my Fine Art America / Pixels print store.
Disclaimer: I have no connection with Boris FX other than being a normal customer who purchased a copy of Optics by paying the normal price.
© Copyright Notice
All images copyright Philip Preston photography and digital art. No images by Philip Preston are in the public domain and must not be copied or used for any purpose unless agreed in advance. Use the Contact Form on this website for any enquiries about usage.